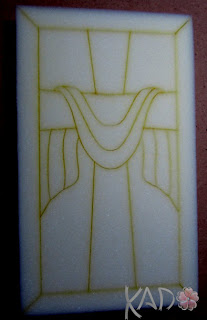
Quilt Magic is similar to "painting by numbers" but you use fabric. The fabric is pressed or tucked into a foamboard with precut grooves. You tuck the fabric one by one until the picture is complete. It's that simple and the end results will give you a beautiful quilted block that you can hang or display in your home.

For my first Quilt Magic design, I choose the mini cross design that represents the finished work of Jesus as he rose from the dead on Easter Resurrection Sunday. With this mini design, it was really quick to complete. I finished this design in one hour. There are more complex designs that are larger in size as well that could take a little more time. I recommend starting with a simple or smaller design to get comfortable before tackling the larger designs.
List of Supplies:
1. Quilt Magic kit of your choice
2. Fabric (purchased with kit or from your own stash)
3. Scissors
4. Kitchen knife
5. Tucking or Punch tool
Here are the 10 easy steps to complete a Quilt Magic kit.
1. Use a kitchen knife and cut through the 4 corners of the foamboard. This will be used to tuck in the fabric in to the corner to get the look of a mitered corner.
2. Cut the templates. The kit comes with a few sheets that has outline shapes to be used as templates to cut the fabric. Cut each shape and organize them.
3. Layout the templates on the fabric and begin to cut the fabric pieces you need to complete your design. Use pins to secure the template down on the fabric. If you have a small piece of fabric, it's a good idea to lay out all the template pieces before cutting to make sure you have enough fabric.
4. Take the cut out fabric and match it up to the diagram to see where the fabric should be placed. Start with #1 and work your way to the last number. Place the fabric in the middle of the foam section and start to use the punch tool to tuck the all around the edges of the fabric into the foam. If you see fabric sticking out, you might have to take the fabric out and re-center it. It could have been shorter on once side and did not have enough fabric to tuck in.
5. Continue to the next number and work your way to the next color..
6. The frame edge can be done first or last, it doesn't really matter. Lay the fabric down and place the foam on top of it.. Tuck the frame edge and do the corners last. There is a bit more excess fabric and might not fit nicely in the corner slit. So trim the fabric on a 45 deg angle and tuck from the top and also on the side
7. Tuck, tuck and tuck some more until you get to the last number.

Here is the final product. It turned out pretty good for my first try. I chose different fabric colors than the kit recommends. The best part about these Quilt Magic is that you can always change the fabric to another color if you don't like it.. They had some really cool designs where I could see potential for a different frame color fabric to match the season or your mood. The possibilities are endless for color with these..
Happy Easter and Resurrection Sunday...
~~Words of Encouragement~~
But He was wounded for our transgressions, He was bruised for our iniquities;
The chastisement for our peace was upon Him, And by His stripes we are healed.
Isaiah 53:5 (NKJV)


0 comments:
Post a Comment