RSS
Showing posts with label embroidery. Show all posts

Saturday, August 4, 2012

Exhausted.. who knew sitting and sewing all day was so exhausting?

It's been a great 2 days at the Original Sewing & Quilting show in Pittsburgh. I'm having so much fun and learning tons of new things..
When you enter the convention center, you' have to get in line to get your daily wrist band and daily drawing ticket.  This drawing ticket is very important.  Each day at the end of the day, they draw a few lucky winners to win a grand prize of a sewing machine or a goodie bag filled with notions and gift certificates. They even pick two winners everyday to get free value package voucher to come back next year for free with classes included.

See the prizes below.  They had 5 sewing machines that they are giving away..  I have one more chance to win a prize tomorrow.. Wish me luck..


So two days down, one more day to go with two more classes left...

Day 1- I had two hands-on classes that I mentioned in my earlier post.
Cosmetic Serger-y Workshop with Gail Yellen and Mini Messenger Tote with Kathy Stachowicz &  Susan Zellers class both were serger classes.. I was right about the serger, they provided each person in the class with a Babylock Evolution serger :-)
I was so happy to get chance to use this machine.  It was a dream to try the serger that claims to be tension free and have auto threading system.  They had a great deal if you wanted to take one home with you.  Retail price is $4000+ but they were selling it for $2500 which includes the project book and the 3 year gold warranty..  
The Cosmetic Serger-y was a great class because Gail basically taught you how to use the serger and what you can do with it.. This a great class for beginners and I had fun playing with the serger and all it's features.
Then in the second class, the Mini Messenger Tote bag with Kathy and Sue, I got to use the serger for the rest of the afternoon to make my tote bag.  It was a good learning experience to be forced to sew with the serger instead of a sewing machine.  I ran out of time so my tote is 75% complete.  I didn't get a chance to put the finishing touches like the handles but it came out really nice.  I'll have to finish it when I get home.
I was so tired after the first day that I just went to bed early.   Who would have thought that two 4 hour classes of sewing was so exhausting???


Day 2 - I had one hands-on class and left plenty of time to go around the expo to go SHOPPING!!
Mitered Corners and Setting Triangles with Nelly Vileikis was such a fun class.  Nelly is so funny and had so much fun, I would come back to take more classes with her.   She explains everything so clear and adds lots of good tips.  There were a lot of mature quilters that commented that her techniques will make their quilting so much easier. 


With this class, we had the Babylock Sophia 2 (sewing & embroidery combo machine).  We only used it as a sewing machine but it's a cute little machine.
Here is the sample piece that we attempted to make during this class.  I was only able to finish 2 mitered squares so I'll post pictures of my finish product once I get it done.
After class, I walked the grounds to check out the vendors.. I'll post more about the vendors tomorrow..  I had some extra time so I went to visit the Make-it Center with Beth Bradley.  There were 4 projects to choose from and I decide to make the Zipper Flower Brooch.  Beth was so nice and patient with everyone.  She would walk you through how to make the project you selected and worked with you on your own pace. It was fun just to sit around chatting with Beth and the other ladies at the table.  Thanks Beth, it was nice meeting you..


Once you completed your project, Beth took a picture of you and your finished project.


Here is my finished Zipper flower brooch with the latest version of the Sew it All magazine.  I chose the white and black polka dot zipper combo. Beth had made one with just the red zippers. You can choose what ever combination you wanted to make.  The pattern for the brooch is in the Sew it All magazine, so go get a copy before the next issue comes out. 


Here is a close up of the brooch.  Option 1 is the way it is supposed to look but I wanted to play with it a bit and turned the larger zipper leaves inside out to get the look for Option 2.  I think it looks great with both ways.  Which one do you like better?

Part 2: Read about the last day and final day of the Expo in my next post.
Part 3: My few of my Favorite vendors at the expo

~~Words of Encouragement~~
Let your roots grow down into Him, and let your lives be built on Him. Then your faith will grow strong in the truth you were taught and you will overflow with thankfulness. Colossians 2:7 (NLT)


Tuesday, July 10, 2012

Current Passion.. Machine Embroidery

About 7 years ago, I was at the stage in my life where I was getting married and so were all my friends.  For a period of 3-4 years, I had average of 10 friends getting married per year.  This meant gifts for the wedding, bridal shower and baby showers came right after for those who had kids right away... So what is a girl to do??  Buy an embroidery machine :-)

I decided to buy a sewing and embroidery combo machine so I can personalize their gifts myself. It took me a bit to figure out what to buy.  Originally I was going to go with a computerized sewing machine that had more stitches to embellish my gifts but when I went to a Sew & Vac store, I discovered about embroidery machines. 
(^-^) and (♥~♥)

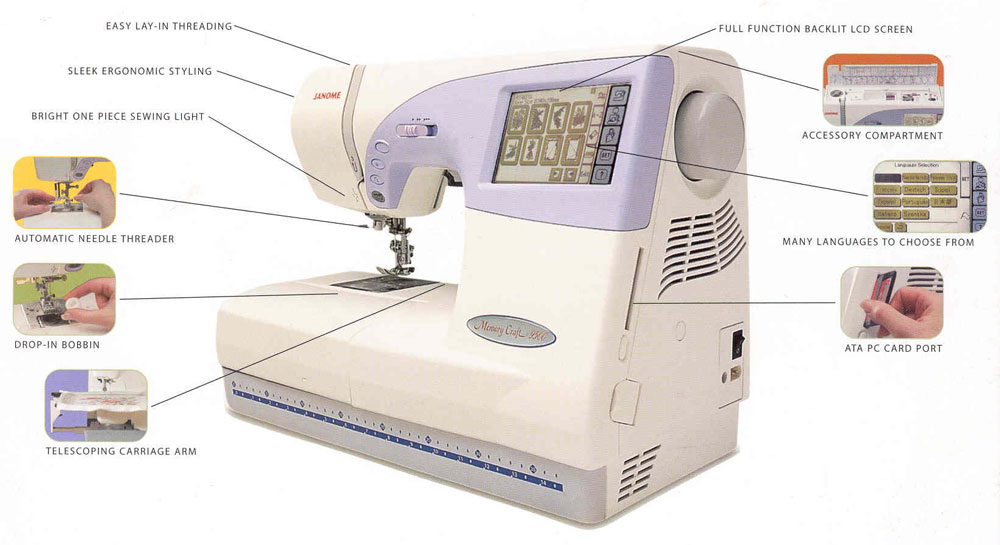
If you never gone to a Sew and Vac store, you're in for a treat.   There were two I visited and each had similar offers but the second one allowed me to bring it home with no cost to try for a week free.  No commitment to buy.. How great is that!! I couldn't resist.. so I tried a computerized sewing machine for a week and went right back to try something else.  I would have been bored quickly with just the computerized one since it's mainly for regular sewing with fancier stitch options.. the guy at the store showed me a combo with embroidery.  The combo is a computerized sewing machine and embroidery machine in one.  It was the best of both worlds.  So I took home a Janome Memory Craft 9500 for a week and fell in love with it..


For those who never tried machine embroidery, go to your local Sew and Vac store and give it a try.  It's so much fun being able to embroidery already made items or sew your own things and add a personal touch.

To start doing machine embroidery there was a slight learning curve.  It's slightly different than regular sewing.  Sewing you just have to worry about the needle and the thread tension.  With machine embroidery, you have to learn about stabilizers and which one to use for the various types of fabrics.  Stabilizers will make or break the outcome of your embroidery because it's primary purpose is to support the fabric and create a well formed stitch.

There are various types of stabilizers to be used to support embroidery design on your fabric.   Most common stabilizers are used as a backing to your fabric to prevent puckering or slipping.   The stabilizers used on top (called topper) of your fabric is used to prevent stitch from sinking into the fabric (like fleece or towels).   Stabilizers come in many different weights and properties.  The most common ones are tearaways, cutaways, washaway, peel and stick.  As you can see the names represent the properties of the stabilizers.  They each have different uses depending on your project.  I prefer the tearaway and the washaway since they come out easily; no trimming needed.
There is so much information out there about stabilizers, I won't go into the same details. Check out the links I've included within this post.

So are you curious on what gifts I started to make with my new embroidery sewing machine???
Well, the weddings was definitely first priority...
I decided to make a wedding frames with the bride and groom's names and wedding date.
 
1st Frame

Thisturned out pretty good for my first attempt. Lots of puckering but not too bad.
2nd Frame

This turned one was too complicated. It looked better in my mind. I was trying to make a Winnie the Pooh wedding party. Way too much puckering.
3rd Frame

I fell in love with the heart frame style. This is one of many using the heart frame. Still haven't learned how to deal with the puckering. :-(
4th Frame

I wanted to try sliver metallic thread but it wasn't a good contrast with the light blue fabric. Puckering is better since i switched to heavier fabric.
5th Frame

I'm getting the hang of this. What do you think? I tried to make each frame slightly different. Look, minimal puckering.. FINALLY.
6th Frame

Last one in the series that I took picture of.
No Puckering (^_^)

So hope you'll get inspired to try machine embroidery.. I had lots of fun creating these wedding frames for my friends.

Question of the Day: What wedding gifts have you created?


~~Words of Encouragement~~
Be strong and courageous. Do not be afraid or terrified because of them, for the Lord your God goes with you; he will never leave you nor forsake you.  Deuteronomy 31:6 (NIV)


Related Posts Plugin for WordPress, Blogger...

Back to Top