RSS

Saturday, August 10, 2013

I'm Back..more free time after Balloon Festival

Some have asked "Where are you been???"... Sorry for disappearing for 2 months.. it's been a crazy last 2 months.. After my last trip to the Sew & Quilt Expo, I had this grand idea to take my craft to the public.. and it definitely was a crazy idea but we did it anyway..

The event: 2013 Quick Chek Balloon Festival from July 26-28.
The plan was to sell decorated apparel on the spot.


2013 Quick Chek Balloon Festival
I've been thinking about doing a craft booth for a while but just didn't know what we wanted to do at the booth. All of the items we typically design can't be easily sold in mass quantities.. But I think we finally found the balance to actually sell personalized items on the spot.

We decided to take our most popular item - the t-shirt and centered the whole concept behind it.

Typically when designing a t-shirt, we would work to create a design specifically for an event or a personalized gift. But selling in an outdoor booth, there were lots of limitations especially if we wanted to keep to KadoHeart's theme to create Gifts from the Heart.

Fashion It Your Way

Fashion It Your Way came to existence with the concept to allow people to create a fashion statement on the spot. Designs were pre-created so that people could mix and match to style a t-shirt with their own unique flair. The person can place the designs anywhere on the shirt and we make that shirt on the spot for them. No two t-shirts would come out the same (unless you wanted it that way).

After two months of preparing for the booth and the designs, the balloon festival finally arrived. Here are some pictures of our booth; the designs were showcased on t-shirts to give people an idea of how they would look.

Fashion It Your Way Booth - Outside


Fashion It Your Way - Inside

Fashion It Your Way Booth - Right Display

Fashion It Your Way - Left Display


The Balloon Festival drew in a lot of crowds coming to attend the concerts and see the hot air balloons ascending twice a day. There were 125 hot air balloon with 10 special shaped balloons. Check out the awesome view we had of the balloons rising from the booth.

Special Shaped Balloon - Elvis

Special Shaped Balloons - Flag and Light house (Dedicated to those effected by Sandy - Stronger than the Storm)

Endless sea of hot air balloons

Special shaped Balloon - Dedicated to the Heros of Sept 11
Click Here to see more balloon fest pictures.
It was a great learning experience especially dealing with extreme weather that mother nature decided to give us for that weekend. I was grateful that it wasn't the 90+ degs like the week before but we had hot and humid weather on Saturday and rain off and on on Sunday. The outdoor concerts still went on even with the rain. Kudos to those who stayed for the concerts.

But the balloon festival came to a close early on Sunday due to a heavy torrential rain that lasted for 45 mins. Lots of people got stuck in the mud and rivers of water flooded many streets. But we were very luck to come out of the rain with no damage to our equipment and supplies. :-)

I tip my hat to those who sell in outdoor craft booths for a living/hobby.. it's not easy with the unpredictable weather. At this point, we're taking a breather to get the house back in order and looking for a Christmas (Indoor) show to try next..

If anyone knows of a good Christmas show that draws a big crowd in the NJ/PA area, let me know..

~~Words of Encouragement~~
The Lord says "I will guide you along the best pathway for your life. I will advise you and watch over you"
Psalms 33:8 (NLT)


Saturday, May 11, 2013

It's time for Spring Cleaning in my Craft Room (Part 1)

Spring has finally arrived!!! I thought winter would never end this year; it's so nice to be able to sit outside to enjoy the sun and hear the birds chirping. Hope you're enjoying the nice warmer weather.. Sorry for those who have allergies, hang in there..

Say Hi to Jimmy from Beba's Boutique

So with Spring here, it's time to air out the house and do some much needed spring cleaning in the house, especially in my craft room. I bought a new cutting table recently from Beba Boutique at the NJ Quilt Fest and have been wanting to rearrange and reorganize my craft room to make it more efficient.

Jimmy is standing in front of the table I bought. It comes in two sizes 5' (32" x 60") or 6' (40" x 72") and two different colors (white or wood). The one in the picture shows the table with both wings opened and the one on the right, is the table with both wings closed. You can also see the wooden color one in the back. That's the color I chose. I was debating on which size to buy since my craft room is small but I opted for the larger 6' one and hoped it will fit properly.
After deciding the size, the next challenge was how to bring it home from the show. We only have a Honda CRV. I didn't think it would fit but we were able to put the whole table in with the wings closed, standing up in the cargo area with the back seats folded down. (FYI, you will need strong guys to lift, the table is super heavy)

The table is 6'(40" x 72") and it came with a cutting mat to fit the full table surface. The height of the table is the perfect height for cutting fabric. I don't have to bend down to cut fabric so it's easier on my back. The best part is that I can cut directly on it since the whole table is one big cutting mat.
These pictures below can be found on Beba's website.

Cutting Mat and Table with both wings opened
Originally I was thinking that if the table is too big, I could use it with one wing closed.

Table with one wing open

Or maybe store it with both wings closed and roll the table out when I needed it for cutting large pieces of fabric.

Table with both wings closed


With any craft room, the cutting table is probably the largest piece of furniture since you need a large space to lay out the fabric to cut out patterns. But with my small craft room, I have reorganized the furniture at least 3 times in this room to try to get the cutting table to function like a kitchen island. When cutting fabric, I'm always trying to turn the fabric or pattern around to get to where I need to be but with an island table, I can go around the table on all sides and not move my fabric.


So I thought I did a pretty good job on my last attempt to rearrange my furniture. I was able to get two tables for cutting with enough space to walk all around the cutting table. I used a dining table for my main cutting table and a folding table with risers to raise the height for my secondary table.

Before 4a
Main Cutting table


Before 2
Secondary Cutting table

This table configuration worked great as I was able to go around the table but it was too short and after a while, my lower back was hurting with all the bending. So when I saw the table from Beba's, I couldn't resist. The size, height, storage and free large cutting mat was perfect for what I needed.

After a few tries, here is my new cutting table.

After 2a

I took my main table and moved it to the back wall and overlapped it with the new cutting table under one wing.

After 1a

I also had enough height under the new cutting table to place my embroidery thread storage units underneath it.


After 5a

I was worried about the size but I was able to fit it in the room and still have enough table to walk around the table. With this setup, the room feels more roomy and more spacious than the last configuration.
Look at the length of my new cutting table.. Isn't it lovely.. :-)


final


More Spring cleaning and organizing to come... What are you doing for Spring cleaning?

~~Words of Encouragement~~
The Lord will send rain at the proper time from his rich treasury in the heavens and will bless all the work you do.
Deut 28:12 (NLT)


Saturday, March 23, 2013

No Sew Quilt Block for Easter

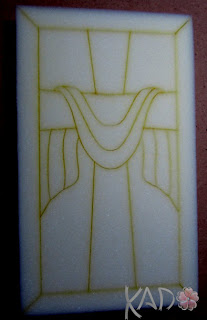
With Easter right around the corner, I wanted to try out a new product I found called Quilt Magic. It's a simple technique to learn and it requires NO SEWING!!!

Quilt Magic is similar to "painting by numbers" but you use fabric. The fabric is pressed or tucked into a foamboard with precut grooves. You tuck the fabric one by one until the picture is complete. It's that simple and the end results will give you a beautiful quilted block that you can hang or display in your home.  


For my first Quilt Magic design, I choose the mini cross design that represents the finished work of Jesus as he rose from the dead on Easter Resurrection Sunday. With this mini design, it was really quick to complete. I finished this design in one hour. There are more complex designs that are larger in size as well that could take a little more time. I recommend starting with a simple or smaller design to get comfortable before tackling the larger designs.


List of Supplies:
1. Quilt Magic kit of your choice
2. Fabric (purchased with kit or from your own stash)
3. Scissors
4. Kitchen knife
5. Tucking or Punch tool


Here are the 10 easy steps to complete a Quilt Magic kit.

1. Use a kitchen knife and cut through the 4 corners of the foamboard.  This will be used to tuck in the fabric in to the corner to get the look of a mitered corner.

2. Cut the templates.  The kit comes with a few sheets that has outline shapes to be used as templates to cut the fabric.  Cut each shape and organize them.

3. Layout the templates on the fabric and begin to cut the fabric pieces you need to complete your design.  Use pins to secure the template down on the fabric.  If you have a small piece of fabric, it's a good idea to lay out all the template pieces before cutting to make sure you have enough fabric.

4. Take the cut out fabric and match it up to the diagram to see where the fabric should be placed.  Start with #1 and work your way to the last number.  Place the fabric in the middle of the foam section and start to use the punch tool to tuck the all around the edges of the fabric into the foam.  If you see fabric sticking out, you might have to take the fabric out and re-center it.  It could have been shorter on once side and did not have enough fabric to tuck in.

5. Continue to the next number and work your way to the next  color..

6. The frame edge can be done first or last, it doesn't really matter.  Lay the fabric down and place the foam on top of it.. Tuck the frame edge and do the corners last.  There is a bit more excess fabric and might not fit nicely in the corner slit.  So trim the fabric on a 45 deg angle and tuck from the top and also on the side

7. Tuck, tuck and tuck some more until you get to the last number.


Here is the final product.  It turned out pretty good for my first try.  I chose different fabric colors than the kit recommends.  The best part about these Quilt Magic is that you can always change the fabric to another color if you don't like it.. They had some really cool designs where I could see potential for a different frame color fabric to match the season or your mood.  The possibilities are endless for color with these..

Happy Easter and Resurrection Sunday...


~~Words of Encouragement~~
But He was wounded for our transgressions, He was bruised for our iniquities;
The chastisement for our peace was upon Him, And by His stripes we are healed.
Isaiah 53:5 (NKJV)


Sunday, March 17, 2013

Much needed Birthday Weekend Getaway!!


This weekend, my husband took me away for a much needed gateway to celebrate my birthday.. It just so happens that Lancaster, PA was having a Quilt Week so we decided to make plans to fill the whole weekend in Lancaster. There were multiple events being offered during the week for all those sewing and quilt lovers.  Two major events: the Lancaster Quilt Show and the American Quilt Socity QuiltWeek.


I decided to attend the Lancaster Quilt Show because it was more quaint with local vendors and they offered a class to make a quilted bag :-)
This show was smaller than I thought it was going to be but it turned out that they had to split the show into two locations.  The main location is in the Expo center of the Host Resort which had the quilt display, the vendors and the classrooms. 


The second location was across the street at the Continental Inn.  This is where the rest of the vendors was situated, you can find vendors in every possible nook and crany of the Inn. Every were you turn there was another section to explore. They also had quilts hanging through out the Inn on display.  This is the view from the entrance of the Quilt Mall
Lancaster Quilt Show - Quilt Mall

The class I signed up for was called "Terrific Tote" taught by Stephanie Farrell.  She walked us through how to make this bag.. Look how great this bag turned out.. only took me 4 hours to make. :-)
It has an cellphone pocket on the front side, two big pockets on the inside and a magnetic closure.  The bag wasn't so hard to make but the next time, I would chose my own colors..


Stephanie is the owner of Country Stitchin in Cambridge Springs, PA.   Stephanie has a great easy going personality, very patient and made the class really fun. Four hours of class zoomed so quickly with all the chatting the class did.  So if you ever get a chance to take a class with Stephanie, you'll be in for a treat.  Also if you want a class to improve your longarm skills, her husband Dusty is a pro.. check out some of his youtube videos; the free motion glow in the dark video looks very cool.
They had one of their quilts on display at the show.  Look at the details of this quilt.

Then to end the weekend, we bought tickets to Sight and Sound Theatre to watch NOAH.  For those who have never watched a show at Sight and Sound Theatre, you have to try it at least once.  It's like watching the bible come to life but broadway style.  The music and characters bring the story come to life right before your eyes.  This particular show about Noah's life as he builds the Ark was truly amazing.  They used live animals as well as life-like animals as Noah filled the Ark but at times you can't tell which animal was real vs the fake ones.. It was pretty cool the way they made you feel as you were inside the Ark with Noah.  Noah is only playing Mar 9-Dec 30 2013 so don't wait, the seats go quickly. It's a must see for all ages.

~~Words of Encouragement~~
For the Kingdom of God is not a matter of what we eat or drink,
But of living a life of goodness and peace and joy in the Holy Spirit.
Romans 14:17 (NLT)

Sunday, February 10, 2013

14 DIY Valentine treats for your someone special..

It's that time of year again when love is in the air and Valentine’s Day is just around the corner. I love this time of year because all hearts are out. This is the only time I can indulge in my love of everything heart shaped.. Everywhere you turn, everything has a heart on it. Love it..

Lots of people are scrambling to find the perfect gift to show their someone special how much they love them. It's not always about how much money you spend but it's the thought that counts; your labor of love will show how much you care.

So to keep with my love for everything hearts, hope this list of DIY heart shaped treats will inspire you to make a special something for the Valentine in your life.. Whether its your mom, dad, grandma, wife, husband, sister, best friend, aunt or child, give them lots of love during this Valentine's Day. Enjoy!!

14 DIY Valentine Treats


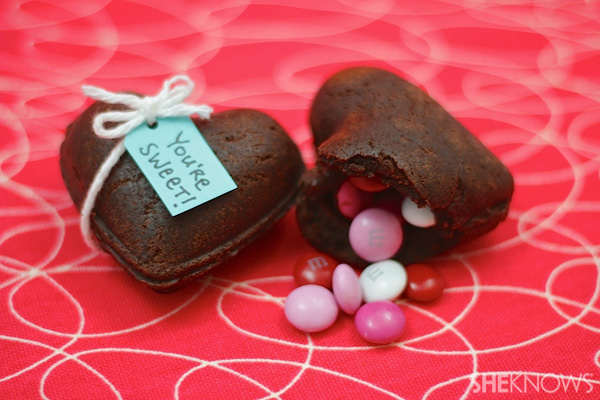
Heart Brownie Treasure Box for dessert

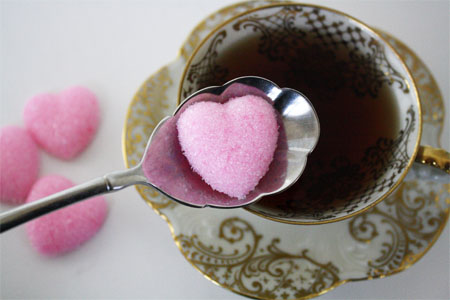
Add a Sugar Cube to your coffee

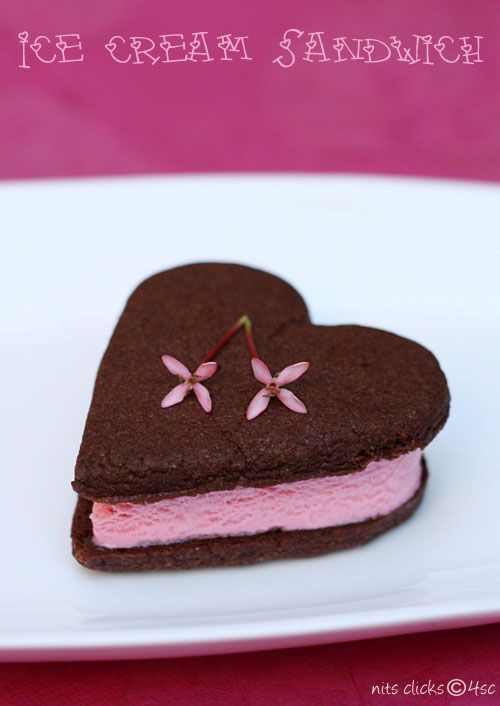
Heart Ice Cream Sandwich

Heart Marshmallow with a nice hot chocolate

Heart Eggs to add something special for breakfast

Heart Healthy Sushi Roll
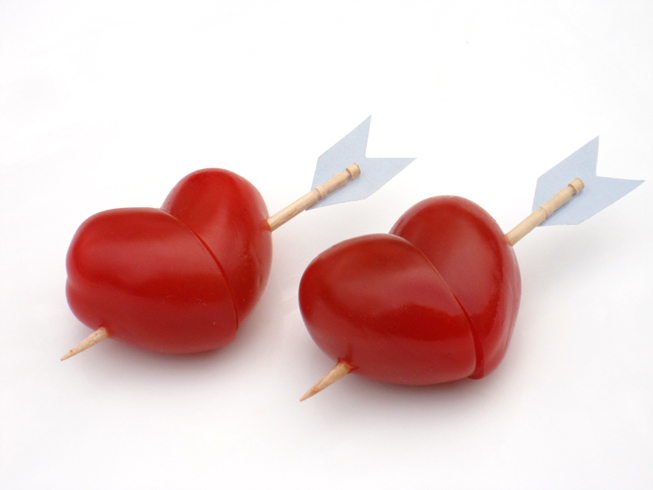
Heart Cherry Tomatoes to add to your salad
Cupid's Fruit Arrows
Hot Dog Hearts

Mini Heart Pizza for lunch. Great for the kids

Heart Apple Chips and Dip

Cinnamon rolls full with Love <3

Heart Milk Ice cubes for your precious ones

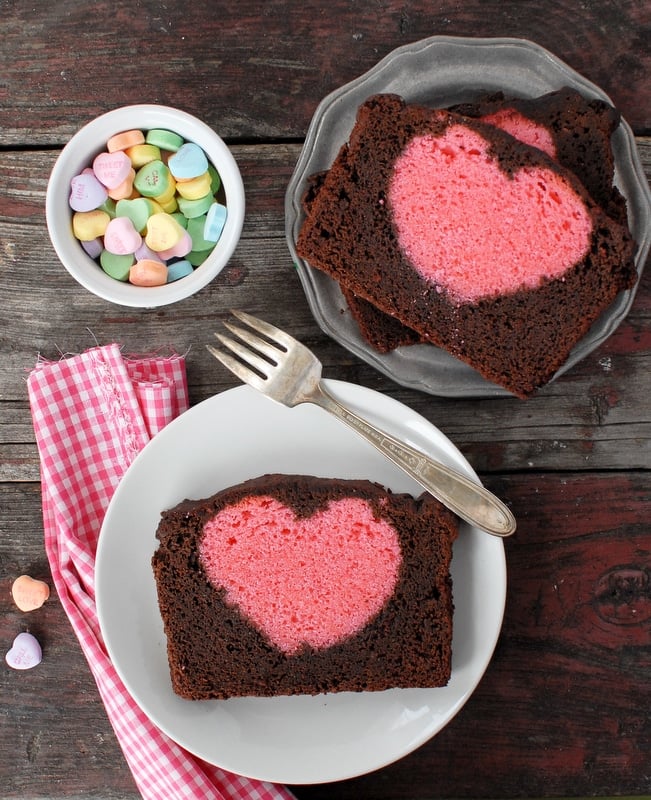
Pound Cake with hidden surprise inside

~~Words of Encouragement~~
Love is patient, love is kind.
It does not envy, it does not boast, it is not proud.
It does not dishonor others, it is not self-seeking,
it is not easily angered, it keeps no record of wrongs.
Love does not delight in evil but rejoices with the truth.
It always protects, always trusts, always hopes, always perseveres.
Love never fails...And now these three remain: faith, hope and love.
But the greatest of these is love.
1 Corinthians 13:4-13 (NIV)